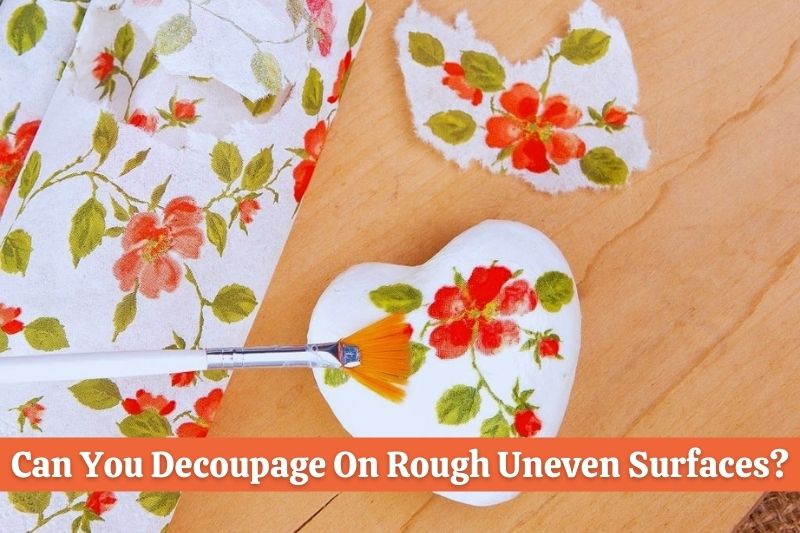
For many Decoupage projects, the surface you are gluing your paper and materials to may be rough, uneven, and not smooth.
This can sometimes make it a little harder to get a flat or even finish in Decoupage as your materials may wrinkle, buckle, or get bumpy once they’ve adhered to the uneven or rough surface.
But is it still possible to Decoupage onto uneven or rough surfaces and get a good finish?
So can you Decoupage on rough uneven surfaces? The short answer is yes, you can Decoupage on uneven or rough surfaces. Even though it’s usually easier to Decoupage onto smooth and flat surfaces. You can dampen the material you are Decoupaging such as paper to make it form around uneven and rough surfaces before sticking it down.
You can Decoupage onto almost any surface providing you can stick down your paper or materials to the chosen surface using Decoupage glue. This includes rough, uneven, unfinished surfaces.
While it is a lot easier to Decoupage onto flat and smooth surfaces, simply because they allow you better control over the finish.
You are still able to Decoupage onto rough or uneven surfaces with practice, and by doing a few things beforehand to prepare the surface and the materials being glued down.
How Do You Decoupage Rough Surfaces?
So how do you apply Decoupage to surfaces that are rough or unfinished?
To apply Decoupage to rough surfaces, it’s always a good idea to prepare the surface beforehand by cleaning or sanding the surface. You want the surface to be as flat and smooth as possible before applying Decoupage. You can also basecoat the surface if needed using a primer or acrylic paint.
For many rough surfaces such as Wood, Metal, Tin, Terra Cotta, Clay, Etc. You can clean the surface and lightly sand it using fine sandpaper. Using 400 grit sandpaper to sand the surface is a great way to remove roughness and rough edges from the surface.
You can also use a primer or paint as a basecoat on rough and unfished surfaces. After sanding and cleaning, you can apply a basecoat of Gesso or Acrylic paint to help you get a smoother surface that is ready to be Decoupaged once it’s dried.
However for certain rough surfaces such as Plastic, Paper, Glass, or anything else that is too fragile to sand, clean, or paint. You will need to find a way to incorporate the rough or unfinished surface into the finish of your Decoupage project.
It’s always a good idea to test applying Decoupage onto any rough or unfinished surface you are planning to use in your projects. This allows you to figure out what the finish will be like, and the best materials to use to get the finish you are looking for.
For many rough surfaces, paper is an ideal material to practice with and use for Decoupage, as it can be applied in multiple thin layers using Decoupage glue or Mod Podge.
How Do You Decoupage Uneven Surfaces?
So how do you apply Decoupage to uneven surfaces and items that are not flat?
To apply Decoupage to uneven surfaces, you should use thin materials such as paper or napkins because they make it very easy to glue down and form around an uneven surface. You can also dampen paper using small amounts of water to make it easier to wrap around an uneven surface before gluing it down.
For many uneven surfaces, it’s usually best to use thin materials like paper, napkins, tissue paper, or fabric. As they make it easier to Decoupage an uneven surface because they can be formed or wrapped around the surface before being glued.
When you are using absorbent materials, you can also dampen them with small amounts of water or glue to help you form them to the uneven surface before sticking them down.
Even though it may sometimes seem hard to Decoupage an uneven surface that’s not flat. It just takes a little practice to get good at adhering paper or materials to the surface.
So if you are using an uneven surface in your Decoupage project, you can always practice on the surface using scrap pieces of paper, Decoupage glues, or Mod Podge to see what the results will look like.
One of the best things about Decoupaging uneven surfaces is that you can keep trying until you get it right.
If your project has problems like wrinkles, bubbles, or bumps. Before the glue or Mod Podge has dried completely you can use warm water to remove the paper and water-based glue from the surface to start over.
Should Decoupage Always Be Smooth?
The short answer is no, not always. Some Decoupage projects can still look charming even if the finished final surface is not smooth. Using a Tissue paper for Decoupage can be one example, as it’s sometimes hard to get a smooth, wrinkle-free finish using this paper, but it can still look great.
So the final finish of your Decoupage project doesn’t always have to be smooth. It depends on the look, appearance, and finish you want for your project.
This can also be true for some uneven or rough surfaces that you are planning to Decoupage. As sometimes there is not much you can do to smoothen or flatten the surface before gluing down your designs.
Some Decoupage materials such as Tissue Paper can make it very hard to get a wrinkle-free and smooth finish. So it’s usually best to incorporate the look and feel of the materials you are using into your project.
Also, for some projects, you may want the Decoupaged surface to be layered using different paper and materials. This can give it a 3-dimensional appearance. This means you will sacrifice a smooth or flat surface on Decoupage to get this finish.
So it’s fine for a Decoupage surface not to be flat or smooth if this adds something to the overall look or design of your Decoupage.
Can You Decoupage Curved Surfaces?
You can Decoupage curved surfaces and almost any surface in your projects. To apply paper to a curved surface, you can use scissors to cut slits in the paper wherever it’s likely to buckle when being wrapped around the surface. Then apply glue or Mod Podge to stick it down.
When you are Decoupaging a curved surface it’s always a good idea to plan out your project and measure up your paper or chosen materials to the curvy surface.
The easiest way to Decoupage a curved surface is to use scissors to cut slits in the paper or materials you are using. This allows you to evenly wrap and conform the materials to the surface before gluing them down.
For corners, before applying Decoupage glue or Mod Podge you can fold the paper or materials around the corners of your project surface. Once folded around, the edges will be marked with a crease allowing you to glue them down accurately.
Using Decoupage on a curvy surface or corners of your project can take a little practice, as it’s sometimes hard to get an even or smooth finish that doesn’t contain wrinkles, creases, or bumps where your materials overlap.
However, on many large curved surfaces, you may still be able to use a roller, brayer or your hands to flatten and smooth out the material to the curved surface.
Can You Use Mod Podge On Rough Uneven Surfaces?
The short answer is yes, you can use Mod Podge on rough or uneven surfaces. You can also use Mod Podge to basecoat uneven and rough surfaces with a few coats of glue, before adhering your paper and materials to the surface. Mod Podge is a multipurpose glue, sealer, and finish that works on many surfaces.
If you are using Mod Podge on uneven or rough surfaces. It’s usually recommended to prepare, smoothen and flatten the surface as much as possible before applying it as glue.
For many surfaces such as Wood, Metal, Tin, or Terra Cotta. You can clean and sand the surface using a fine 400 grit sandpaper before applying Mod Podge.
If you cannot clean or sand the surface to make it smooth. You can also use Mod Podge to apply a few coats of glue as a basecoat to the surface. This can help make the surface more flat or smooth before adhering materials to the surface.
Can You Use Decoupage Rollers On Rough Uneven Surfaces?
Yes, you can use a Decoupage Roller on rough and uneven surfaces providing it helps you get a smooth finish and the surface is not too rough or bumpy. But you should be very careful when using the roller on a rough surface to ensure it does not damage or tear the paper or materials you have used.
Using a Decoupage roller on rough and uneven surfaces can sometimes be a little bit hit and miss. As not every uneven or rough surface will be suitable for using a roller.
Some Decoupage surfaces may be too fragile once they’ve adhered to a rough or uneven surface. This can make it too risky to use a roller, as it may damage or tear the surface, or make wrinkles or creases more pronounced.
Decoupage rollers usually work best on flat or smooth surfaces where you can roll the surface in large strokes flatly and evenly to get a smooth finish.
So before using a Decoupage roller on any rough or uneven surface. You should consider how this may affect the surface of the materials you have used and glued down.