For some Decoupage projects, the surface you are planning to use in your designs may not always be ideal. The surface can sometimes be rough, unfinished, or bumpy which means that you may need to sand it.
This is especially true if you’re trying to Decoupage on unfinished wood, metal, or terra cotta surfaces.
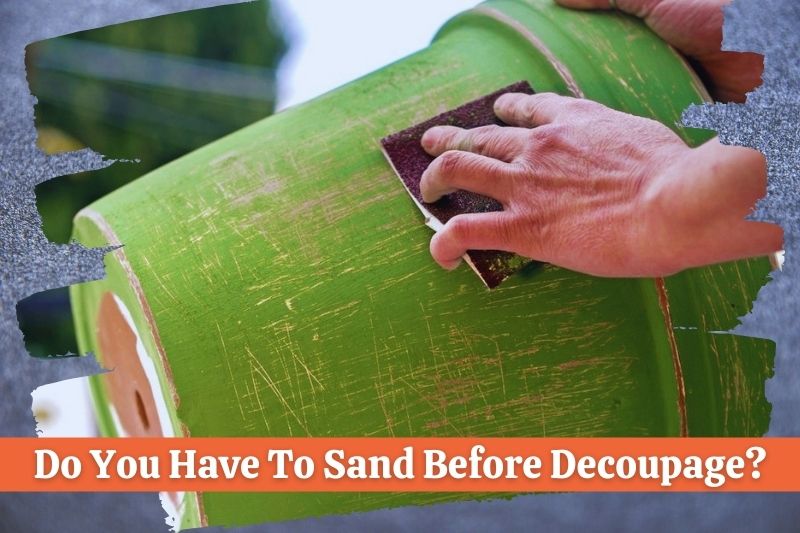
So do you have to sand before Decoupage? For many surfaces, it’s always a good idea to sand and clean them before applying Decoupage. On surfaces such as Unfinished Wood, Metal, or Terra Cotta you should lightly sand the surface to make it as smooth as possible. Sanding before Decoupage helps to prevent air bubbles and wrinkles in the finish.
Sanding many surfaces such as wood, metal, terra cotta, or tin before applying Decoupage is a great way to ensure the finish of your project is as smooth as possible.
This is because it allows you to remove imperfections from the surface that may affect the final finish of your glue and Decoupage.
These imperfections removed by sanding can include bumps, uneven areas, rust, dirt, grease, and anything that will harm the final finish.
But for some fragile surfaces such as plastic, only certain plastics are suitable for Decoupage or sanding. So always ensure the surface you are using is suitable for sanding, and test it with your sandpaper.
How Do You Sand And Prepare A Surface For Decoupage?
So how do you sand and prepare your chosen surface before applying Decoupage?
Before starting Decoupage on Wood, Metal, Tin, Or Terra Cotta. You should prepare the surface by sanding it using light-to-medium grit sandpaper. You should then wash or clean the surface, let it dry completely, then apply your glue and Decoupage.
For many Decoupage surfaces, only a small amount of sanding will be needed to help ensure the surface is smooth and free from bumps, rust, or imperfections.
However, if you are using surfaces such as Unfinished Wood, or a surface that is dirty, rusty, or rough. These surfaces may require a lot more sanding, cleaning, and preparation before applying Decoupage.
Here’s how to sand and prepare most surfaces for Decoupage:
- Sand the surface using light-to-medium grit sandpaper. Lightly sand the surface taking great care to remove bumps, rust, dirt, and imperfections. Smoothen and flatten the surface as much as possible.
- Clean the surface using a cloth and water. After sanding, you should clean the surface to remove any dust, dirt, or debris caused by sanding. Ensure the surface is clean and smooth.
- Allow the surface to dry completely. After using a cloth and water to clean the surface. You should allow it to dry completely before applying Decoupage. This helps to stop additional moisture on the surface causing problems.
- (Optional) Apply a basecoat of primer or paint. Once the surface has dried, if you want you can apply a basecoat of Gesso or Acyclic paint to the surface. This can help to further prepare and smoothen the surface for Decoupage.
- Apply your Decoupage. Once the surface has been sanded, cleaned, and prepared for Decoupage. You can start gluing down your Decoupage designs and decorating the surface.
What Sandpaper Should You Use for Decoupage?
For most Decoupage projects, it’s recommended to use light-to-medium grit sandpaper or fine sandpaper such as 400 grit. This is because fine or light-to-medium sandpapers are a lot more gentle on the surface and perfect for use in Decoupage.
So any fine sandpaper similar to 400 grit will be fine to use for Decoupage. Simply because they are gentle on the surface, and allow you more control over how smooth the final surface will be.
You can also use fine sandpaper such as 400 grit and water to lightly sand Mod Podge or Decoupage glue once it’s been applied to the surface.
For hardier surfaces such as Wood or Metal. You can use heavier grit sandpapers for Decoupage. However, Heavy grit or coarse sandpapers are not always suitable for most surfaces, as they can strip, scratch, or damage more of the surface.
So the ideal sandpaper to use for Decoupage will usually be fine sandpaper such as 400 grit for most surfaces. It allows for gentle sanding and does not mark or scratch the surface as much as heavier sandpaper.
Should You Sand Wood Before Decoupage?
Not all Wood surfaces will need sanding, but you can sand the Wood if it needs it before Decoupage. For Unfinished Wood, you can sand the surface using light-to-medium grit sandpaper. Then clean the surface and allow it to dry completely before applying Decoupage.
As previously mentioned, you don’t need to sand all wood surfaces before starting your Decoupage project. Some surfaces such as wooden furniture may only need to be cleaned using warm, soapy water before applying Decoupage.
Sometimes the current finish of the wood may add something visually to the finish of your Decoupage without sanding it. So it’s worth considering leaving the wood as it is without sanding and just cleaning the wooden surface using water.
For wooden surfaces that will require sanding, such as unfinished or painted wood. It’s a good idea to use fine sandpaper to gently remove imperfections, dirt, knots, or paint from the surface.
You will want any wooden surface that you use for Decoupage to be as smooth and even as possible. Making sure it is smooth and clean will help to ensure your Decoupage project can be applied without wrinkles, streaks, or air bubbles on the surface.
If you have sanded the wood surface before Decoupage, you can also use a Wood Sealer or Varnish to make the surface smooth, waterproof, and free from imperfections.
Should You Sand Metal Before Decoupage?
You can sand metal surfaces before Decoupage if they are rough, bumpy, and not smooth. It’s recommended to clean most metal surfaces such as Tin with soapy water to remove grease, oils, dirt, or anything that may affect the finish. Then lightly sand away any imperfections on metal before applying Decoupage.
If you are sanding metal surfaces for Decoupage, it’s important to use a fine sandpaper or sanding block to avoid damaging the surface. Sanding metal can get rid of the shine, and dull the surface.
So you should use fine sandpaper such as 400 grit to gently remove any imperfections from the metal surface before Decoupage is applied.
For many metal surfaces, once you have sanded and cleaned them it’s a good idea to consider adding a basecoat of primer or paint. Gesso or Acrylic paints work well for many metal surfaces, as they allow you to adhere your Decoupage glue and designs to a smooth surface once they have dried.
So to get the best possible finish on metal surfaces for Decoupage. You should gently sand the surface using light-to-medium sandpaper if it needs it. Then clean the surface using warm soapy water and allow it to dry before applying primer, paint, and Decoupage.
Do You Sand Terra Cotta Before Decoupage?
When you are preparing Terra Cotta Pots or Planters for Decoupage. You should lightly sand away any rough edges and imperfections on the surface using light-to-medium sandpaper such as 400 grit. It’s then a good idea to apply a basecoat of waterproof sealer or paint before applying Decoupage.
If you are using Terra Cotta for Decoupage, not every surface will need sanding especially if it’s a Terra Cotta Pot or Planter that’s never been used.
You only need to sand Terra Cotta if the surface is rough, has rough or uneven edges, or the surface will affect the final finish of your Decoupage.
In most cases, you can start Decoupaging on Terra Cotta without sanding the surface. But it’s a good idea to consider adding a waterproof sealer or paint if the Terra Cotta item will be left outside or housing plants.
For old or dirty Terra Cotta pots and planters. You can use sandpaper to remove any dirt or rough areas found on the surface. Weathered pots and planters can take a lot of work, but you can remove most imperfections using fine sandpaper and water.
Can You Sand Plastic Before Decoupage?
You can only lightly sand certain plastics for Decoupage as sanding may scratch or dull the surface. Also, only some plastics are suitable for use in Decoupage as the surface needs to be porous enough to adhere with glue and materials like paper. When sanding plastic, use very light fine-grit sandpaper.
It’s not usually recommended to sand plastic surfaces for Decoupage as many plastics can be prone to scratching or dulling when using sandpaper.
When you sand certain plastics this may leave small marks, scratches, or dull the surface and turn it cloudy or white which can be very hard to remedy later.
However, if you are covering the entire plastic surface with your Decoupage project or painting the surface. In some instances, you can prepare the surface using fine-grit sandpaper such as 400 grit. This can help your paint, materials, Decoupage glue or Mod Podge adhere to the surface.
But if you are using a plastic surface for Decoupage, you should always be very careful when preparing the surface. It’s a good idea to test your sandpaper, Decoupage glue, and materials on the surface before using them in your main project.
Can You Paint After Sanding Before Applying Decoupage?
Yes, you can paint the surface after sanding before you apply your Decoupage. Painting the surface using a primer such as Gesso then letting it dry will help you to prepare and smoothen the surface before adding Decoupage. You can also use Acrylic Paint and many other paints to basecoat the surface.
For some surfaces such as metal, tin, or unfinished wood. You may need to basecoat the surface after sanding using a primer or paint to ensure you get a smooth Decoupage finish.
Painting the surface before Decoupage can also help you make your project pop, and look more vibrant or colorful than it would on a bare surface.
So if you want to paint the surface after sanding before you apply Decoupage. This is fine, and a great way to ensure the surface is smooth, even, or has a good base color before applying your Decoupage.