Finding streaks on the final finish of your Decoupage project is a very common problem many people will run into when using different glues or brushes on their designs.
Once the top coat has dried, your Decoupage may be covered in streaks or unsightly marks that can seem hard to remove and avoid.
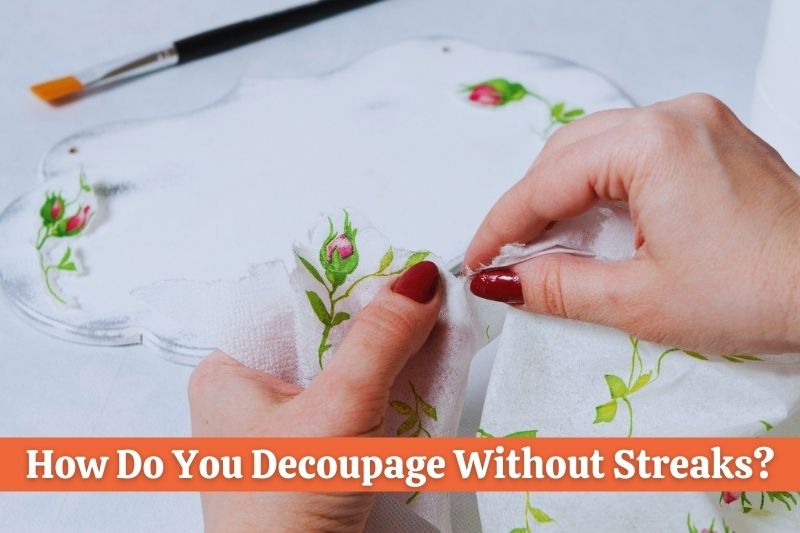
So how do you decoupage without streaks? To Decoupage without streaks, you can use a Matte finish Decoupage glue and apply several thin coats using a foam brush instead of a bristled brush. Once the final coat is dry, you can sand any visible streaks with 400 grit sandpaper and finish the final top coat with an acrylic sealer or spray.
What Causes Streaks In Decoupage?
When you are applying Decoupage glues, sealants, or mediums on the final coat of your project. What causes streaks to appear in the final finish of Decoupage once it has dried?
Here are the things that cause streaks in Decoupage:
- Applying glue before the previous coat has fully dried. This can pull the previous coat away from the surface, creating streaks and uneven drying on the surface.
- Using the wrong brush to apply glue. If you use a thick bristled brush or a brush that is too large, it can be hard to apply thin layers of glue which may cause streaks, brush strokes, or marks once it’s dried.
- Glossy finishes. Decoupage glues with a glossy finish are usually more prone to visible flaws and streaks. They can also be more fragile and less resistant to damage once dried than Matte or Satin finish glues.
- Applying glue too thickly. If your application of Decoupage glue is too thick it can cause a lot of problems, including streaks, wrinkles, bubbles, or brush marks on the final surface once it’s dried.
- Uneven application of Decoupage glue. Your Decoupage may also have streaks because you did not apply the glue evenly, or in a uniform manner. Some areas may have a thicker application than others.
How to Fix Streaks in Decoupage?
If you have finished your Decoupage project and notice that the final finish or coat has visible streaks. How do you fix it and avoid streaks on the top coat?
Here’s how to fix streaks in Decoupage:
- Use 400 grit sandpaper to lightly sand any streaks. Using fine sandpaper you can lightly sand and polish the final coat with water. This will smoothen the surface, and soften or remove visible streaks.
- Apply several thin coats of Decoupage glue. Instead of applying one thick coat of glue, apply multiple thin layers and allow it to dry between coats. This helps you achieve a smooth and even surface. It also stops the Decoupage from being sticky or taking too long to dry.
- Use a Matte finish. If you Apply a Matte finish glue on the final coat of your Decoupage. It can cover or disguise visible streaks and brush strokes, leaving you with a smoother surface.
- Use an Acrylic sealer on the final coat. You can use an acrylic sealer or polycrylic to help reduce streaks on the final surface. Most acrylic sealers provide a smooth, hardened surface with a durable finish.
- Use the right brush for glue application. Using a foam brush instead of a bristled brush is the best way to avoid streaks and get an even application of Decoupage glue without brush strokes.
Does Sanding Decoupage Remove Streaks?
Yes, lightly sanding streaks on Decoupage with 400 grit sandpaper is a great way to remove streaks and achieve a smooth finish. Sanding will not destroy the finish if you do it gently. You can also test the sandpaper on your chosen Decoupage glue before sanding your main project or surface.
Using sandpaper in Decoupage is a great way to fix many different mistakes that may occur when using different glues and sealants.
For streaks on the surface, #400 grit fine sandpaper usually works best in Decoupage as it’s very easy to gently sand and remove any streaks, bumps, or brush strokes on the surface.
To lightly sand the final finish of your Decoupage, you should use 400 grit sandpaper with water. Wet the sandpaper and gently sand any problem areas on the surface to get a smooth finish.
Does Using Decoupage Glue As Top Coat Cause Streaks?
Using a Decoupage glue as the top coat or final finish of your project can cause streaks and brush strokes. This is especially if you use Glossy Decoupage glues and bristled brushes. You can use Acrylic sealer or Polycrylic to seal your design and reduce visible streaks or brush strokes.
Even though you can use Decoupage glue on the final finish or surface of your project. It’s a good idea to ensure that the final surface is smooth, clear, and displays your designs in the best way possible without streaks.
Sometimes using a Decoupage glue on the final finish will require you to use fine sandpaper to sand, smoothen, and clean the surface.
But in most cases, it’s a good idea to use Acrylic sealers or spray. As they provide a smooth final coat that is hardened and highly durable.
How Do You Make Mod Podge Less Streaky?
If you are trying to apply Mod Podge without streaks. You can reduce the chances of the Mod Podge becoming streaky once it’s dried by applying it in thin layers using a sponge or foam brush. You can also water down your Mod Podge to help ensure the application is thin, even, and smooth.
Mod Podge is an all-around great glue for most Decoupage projects and surfaces. But it’s always important to consider what formula you are going to use on your project, and how you’re going to apply it.
To avoid streaks on the final coat using Mod Podge, it can be a good idea to use a Matte finish, instead of Satin or Glossy. As its usually better at hiding flaws on the surface, and does a good job of disguising streaks and brush strokes.
The brush you apply Mod Podge with is also important when it comes to avoiding streaks. A foam brush is usually better for application than a bristled brush, as it does not create any visible brush strokes or marks on the surface.