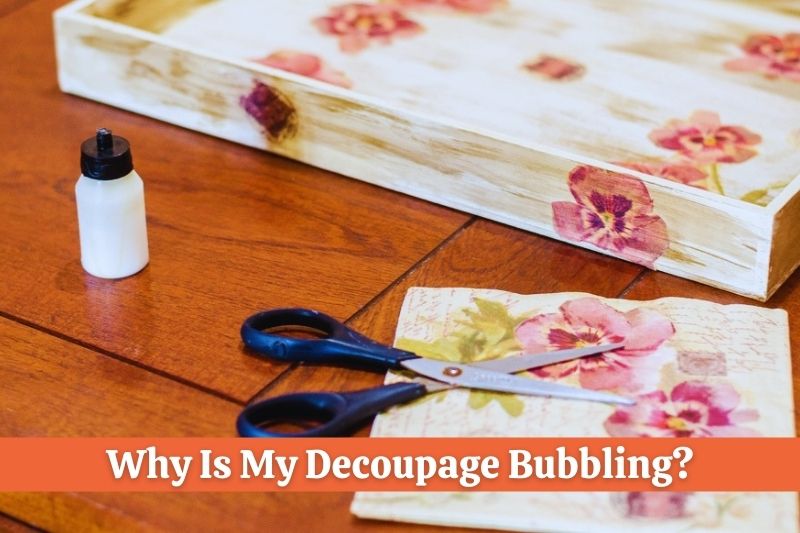
When you are using Decoupage to cover and adhere your chosen materials to a surface. A very common problem you may have is getting bubbles on the finish of your Decoupage.
These bubbles can stop you from getting a smooth and even finish on the surface of your project. They are also very likely to occur when using thin materials such as paper, tissue paper, wallpaper, and fabrics.
So why is my Decoupage Bubbling? Decoupage is bubbling because the surface you are adhering your paper to was not evenly covered in glue or it was not adequately prepared for the application of Decoupage. This leads to parts of the paper not being glued to the surface properly, which causes bubbles and wrinkles once it begins to dry.
What Causes Bubbles in Decoupage?
If you’re trying your hand at using Decoupage to cover a surface using many different materials and glue. You will eventually face the problem of finding bubbles on the surface and the final finish of your Decoupage.
So what causes bubbles in Decoupage?
Here are some things that cause Bubbles in Decoupage:
1. The Surface Was Not Ready for Decoupage
A common cause of bubbles in Decoupage is when the surface you are applying your materials and glue to is not smooth, clean, or adequately prepared.
Even though you can Decoupage many surfaces such as Wood, Canvas, Metal, Fabric, Or Glass, Ect. You still need to ensure that the surface is smooth, clean, and free from anything that may affect the final finish of your Decoupage.
The condition of the surface can greatly affect how your chosen Decoupage glue and materials will adhere to it. A poor quality, uneven, bumpy, greasy, or dirty surface can increase the chances of getting bubbles in Decoupage.
So you will need to clean, prepare, and make smooth any surface you are planning to use for Decoupage to get a finish that’s free from bubbles, wrinkles, and imperfections.
2. The Decoupage Materials Are Prone To Bubbling
The materials that you choose to use in your Decoupage project can have a significant impact on how likely you are to see bubbles in the final finish.
If the materials you are using for Decoupage are very thin, delicate, absorbent, or fragile. They can be a lot more likely to have problems with bubbles or wrinkles once the glue has been applied.
This is especially true for thinner materials such as paper, tissue paper, rice paper, napkins, scrapbook paper, wallpaper, and some thin fabrics. Simply because they are thin materials that can be more prone to bubbles once the glue has been absorbed and begins to dry.
So it’s a good idea to prepare your chosen materials before using them on Decoupage to ensure you get a smooth finish.
For thicker paper, scrapbook paper, and most Fabrics it’s usually fine to use them as is. But for thinner papers, it can sometimes be a good idea to spray the surface of the paper with a protective coat of acrylic sealer then allow it to dry before using it in your projects.
If you are using tissue paper, it’s important to know that it can be very hard to get a smooth and bubble-free finish. There is not much you can do to prepare tissue paper to avoid bubbles. But that’s sometimes part of the charm of using tissue paper and some thin paper for Decoupage.
3. The Wrong Brush Was Used To Apply Glue
If you want to avoid getting bubbles in your Decoupage project, it’s crucial that you use the right brush to apply your Decoupage glue to your chosen surface and materials.
It’s a good idea to avoid using thick bristled brushes for applying glue as the application can sometimes be uneven, thick, and can leave visible streaks, brush strokes, or bubbles once it’s dried.
So it’s usually better to use a sponge or foam brush as the application of a Decoupage glue such as Mod Podge is usually a lot more even and smooth. It also allows you to get better coverage without worrying about brush strokes.
4. There Are Bubbles In The Decoupage Glue
A hidden cause of bubbles in the Decoupage surface is when the glue itself has air bubbles in the formula. These bubbles in your glue or formula are usually caused by over stirring or shaking the glue.
If you are using Mod Podge or another Decoupage glue. It’s a good idea to ensure you don’t over stir or shake the glue right before using it as most glues are fine to use as is.
Over stirring, mixing, or shaking glue will create air bubbles in the mixture which can inevitably transfer onto the surface of your Decoupage.
So you should resist the temptation to stir or shake your chosen Decoupage glue if you want to avoid bubbles on the surface. If it needs it, do it gently and try to avoid creating air bubbles as much as possible.
5. Thick Or Uneven Application Of Decoupage Glue
When you are applying Decoupage glue it’s important to know that a thick or uneven application of glue can cause many problems on the surface.
These problems include bubbles, wrinkles, stickiness, and uneven drying. Which can make it very hard to get a smooth and even finish in Decoupage.
If you apply too much glue this can cause your materials to bubble or buckle once the glue begins to be absorbed by the materials and starts to dry.
Also, an uneven application of glue will cause some that are not glued down correctly to shift, bubble, or buckle once it begins to dry.
So to ensure you don’t get bubbles or other imperfections on the surface of your Decoupage. You should apply your Decoupage glue in thin, even layers. You will also need to apply it in multiple coats, and allow it to dry completely between each coat.
Applying Decoupage glue in multiple thin and even coats will help you to control the final surface of your project, reduce the chances of bubbles, and get a smooth finish.
6. Unnatural Drying
Believe it or not, if you try to dry your Decoupage project faster by using heaters, ovens, or other tools like hairdryers to speed up the drying process. This can sometimes cause bubbles, wrinkles, or stickiness to occur on the surface.
Unnaturally drying your Decoupage is not usually recommended for all projects as it can make it very hard to control how quickly it dries and the condition of the final surface.
Also, some Decoupage glues don’t always respond well to high temperatures. Most glues are water-based so heat exposure can cause them to dry too quickly on the surface and wrinkle, bubble, or shrink once evaporation occurs.
For most Decoupage glues including Mod Podge, you’re supposed to allow them to naturally cure for 28 days to form a hard shell and protective coat.
But if you are feeling impatient, and don’t want to wait for your project to naturally dry or cure. For some Decoupage projects, you can use an oven to cure your project and bake it for 1 hour at 175°F (79.4°C).
However, not all project surfaces, objects, items, materials, or Decoupage glues are suitable for unnatural drying using an oven or other drying tools. Some surfaces can get very hot, melt, crack, and are not always suitable for unnatural drying.
So it’s usually better to just allow your Decoupage project to dry and cure naturally. As you will have better control over how it dries, cures, and the condition of the final surface on your Decoupage.
7. The Humidity In The Room
Another cause of bubbles in Decoupage can be the humidity found within the room where you are working on and drying your project.
Decoupage glues such as Mod Podge are water-based and they rely on the evaporation of the water found within the glue formula to dry.
So this means in a high humidity environment, or on a humid day. There’s a lot more moisture and water vapor found within the air which can make your project take a lot longer to dry.
High humidity can make it problematic when it comes to getting bubbles and imperfections on the surface of your project. As the Decoupage materials and glue you have used will stay wet for longer.
This means that while it remains wet the Decoupage surface has more time to buckle, wrinkle, shift, shrink or produce unsightly bubbles on the surface.
So to stop this from happening, you should avoid Decoupaging on humid days, as most water-based glues and high humidity don’t work well together.
A simple solution for attempting Decoupage on a humid day is to do it in a dry, air-conditioned room. This helps you to ensure the glue dries as intended and that any high humidity or water vapor within the air does not affect the final finish of your Decoupage.
How Do You Get Bubbles Out Of Decoupage?
Getting bubbles on the surface of your Decoupage project can be a big problem, especially if you want the final finish to have a flat, even, and smooth surface.
So how do you get bubbles out of Decoupage and fix the problem?
Here’s how to fix bubbles in Decoupage:
1. Apply A Thin Layer Of Glue Or Water
Most Decoupage glues and Mod Podge are water-based, which means before it’s dried you can apply another thin layer of glue using a brush or roller to reactivate the bubbled layer and flatten it down.
Once you’ve applied another thin layer of glue, you should be able to work out, smooth, and flatten any bubbles that appear on the surface using your hands, tools, or a roller.
You can also try adding a small amount of water very carefully to the surface to reactive the previous coat of glue and smooth out any bubbles that appear.
2. Use a Roller Or Brayer
If you have applied your Decoupage glue and notice bubbles on the surface. You can use a Rubber Roller, Brayer, or Sponge Roller Brush to try and smoothen out any bubbles that appear.
When using a Roller or Brayer you should roll the surface flat, evenly, and gently. Try to work out any bubbles and make the surface smooth.
For larger bubbles or wrinkles, try to gently work them out towards the edges of your project surface and remove them.
3. Use a Flat Scraping Tool
Using a Flat Scraping tool, you can remove bubbles and imperfections from the surface of your Decoupage.
Many Decoupage glues including Mod Podge do come with handy tool kits specifically designed to help you remove bubbles, wrinkles, and imperfections on the surface. One of these popular tools is the Flat Scraping Tool.
However, as an alternative, you can also use a Paint Scraper to achieve the same result.
Simply use the flat edge of the scraper to flatten and smooth out any bubbles that appear on the surface. Just be careful not to apply too much pressure, especially if you’re Decoupaging using thin paper. Do it lightly and gently, or you may tear or damage the glued surface.
4. Use Your Hands
For some Decoupage projects using your hands or thumb to remove bubbles can sometimes be one of the most effective ways to do it.
This is especially true if you are Decoupaging on an uneven surface that can make it hard to use tools like Rollers, Brayers, or a Flat Scraping Tool.
Using your hands and thumb, you can gently work out and press down on any unsightly bubbles that appear on the surface of your Decoupage. Just ensure to do it lightly, and take care not to shift, tear, or cause wrinkles on the surface.
5. Gently Pop the Bubbles using a Pin
Before your Decoupage has dried completely, as a last resort you can use a straight pin or cocktail stick to gently pop and remedy any bubbles that appear on the surface.
This technique works best if you catch the bubbles early, as you should easily be able to pop the bubble gently and remove it from the surface before it dries.
6. Wait It Out
Depending on the materials you have used for your Decoupage project. If you notice bubbles on the surface you will sometimes have no choice but to wait it out or wait for it to dry.
This is usually due to materials such as paper, napkins, or tissue paper being very thin, fragile and making it very risky to try and remove any bubbles from the surface.
It can also be due to the Decoupage project having many layers, materials, or different designs. As a problem with bubbles on a lower layer or coat of glue can make them harder to remove and remedy.
So it’s sometimes best just to wait it out, and see what the finish looks like once it begins to dry before deciding on what to do next. On some materials when the glue has dried, the bubbles are not as noticeable as they were when the Decoupage glue was freshly applied.
Why Is My Paper Bubbling with Mod Podge?
There can be a few reasons why the paper is bubbling when using Mod Podge. It’s either because the glue was applied too thickly and unevenly to the surface, or there are air bubbles present under the surface of the paper or within the glue.
Mod Podge is a popular multi-purpose water-based glue used in Decoupage. It gives a smooth and clear finish and does not typically cause bubbles to appear on the surface.
If bubbles appear on the surface of the paper when you are using Mod Podge. They are usually caused by how the glue is being applied, and how you’ve prepared your Podge formula before using it.
When you shake or over-stir your Mod Podge right before using it on paper. There’s a good chance that any air bubbles trapped within the formula will be transferred onto your Decoupage surface and paper.
Also, when applying paper to the surface. If you do not apply it evenly, gently, or from the center. You can also trap air under the paper which can cause problems with bubbles appearing on the paper’s surface.
So to avoid getting bubbles when using Mod Podge. You should apply it in thin and even layers, and use multiple coats. You also need to ensure that you don’t trap air bubbles under the surface of your paper and the materials you are using. If you see bubbles, remedy them using a roller before it dries.
How Do You Get Bubbles Out Of Dried Modge Podge?
To get bubbles out of dried Mod Podge, you can use a roller or flat scraping tool to get the bubbles out. But before it’s dried completely you can try adding another thin coat of Mod Podge to re-introduce water to the surface. Let it soften and soak in, then attempt to remove or flatten any bubbles.
Mod Podge is a water-based glue that is water-resistant, but it’s not completely waterproof. This means adding water or another thin layer of glue can soften the surface, allowing you to work on removing bubbles, wrinkles, or imperfections.
If you want to fix bubbles on dried Mod Podge it’s important that you catch them early. The earlier the better before it’s fully dried or cured.
When Mod Podge has dried or cured completely after approximately 28 days. It can be very hard to remove bubbles, as it forms a protective hard coat on the surface.
So when using Mod Podge, especially for Decoupage. You need to be prepared for bubbles or imperfections to appear on your chosen surface and materials.
Always ensure that you have the right tools for your project, such as a Roller, Brayer, or Flat Scraping Tool to flatten the surface and remove any bubbles that may appear before the Mod Podge has fully dried.
What Kind of Brush Should You Use to Avoid Bubbles in Decoupage?
To avoid getting bubbles in Decoupage you should use any brush that allows you to get an even and smooth coverage of your chosen glue. Usually, Sponge or Foam Brushes can work best as they have a smooth application and leave no visible brush strokes.
Even though it’s sometimes preferable to use a Foam Brush to apply Mod Podge or Decoupage glue. You can still use a bristled brush providing it’s a suitable size for the surface and gives you a smooth and even application of glue.
Many people like to use a No 5 Brushes for Decoupage as they are ideal for applying glue to small areas and surfaces. But any brush that allows for a flat and even application of glue will work fine.
Avoiding bubbles when using a brush with glue in Decoupage can be a lot to do with your technique. It’s a good idea to practice on scrap pieces of your project to perfect the application and finish, before moving onto the main project surface.